The mechanical parts on my Trek 4100 mountainbike were getting old and worn out, so I replaced the bottom bracket, front chainwheel, multiple freewheel, rear derailleur and bike chain.
It isn't that difficult, and the process is a lot of fun! On top of that you save a lot of money, in stead of letting your bicycle repair shop do it.
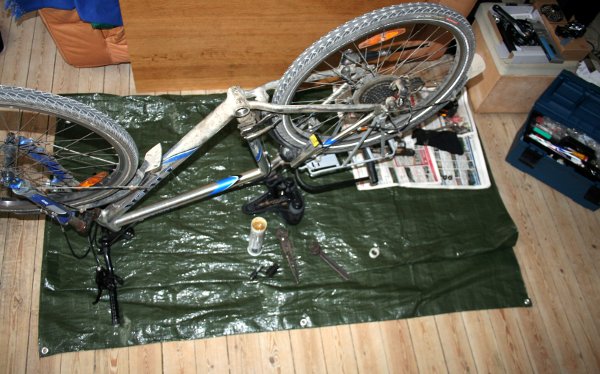
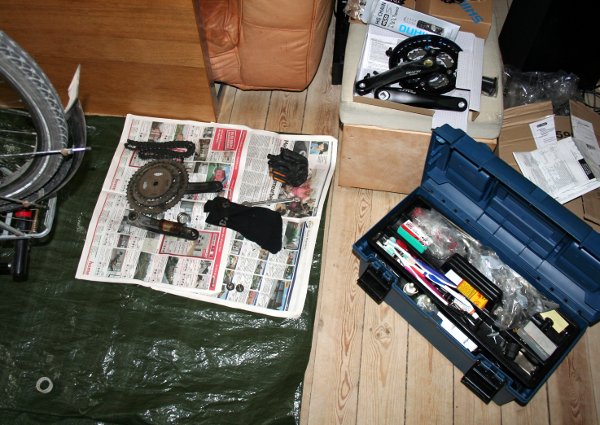
Indoor work area
If you live in the city without access to a garage or workshop, you can make your own by laying out a tarpaulin on the floor, to protect it. Remember to always keep the same side up, otherwise the dirt and grease will end up on the floor! I keep my tools and parts out of the way, but still easily accessible.
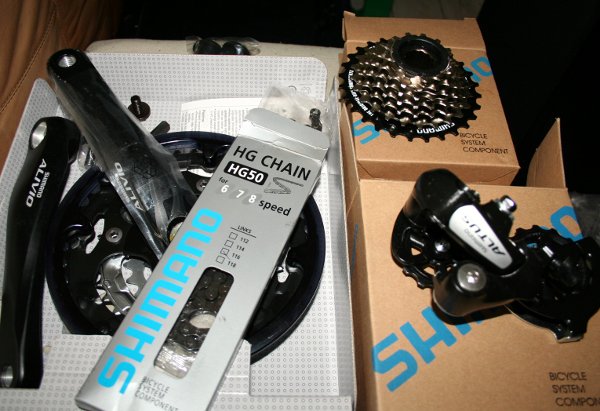
The parts I replaced and their prices
Shimano Sealed Cartridge Bottom Bracket UN26 BB 122,5-73mm (EBBUN26C23X) = € 10
Shimano Front Chainwheel Alivio M411 175mm (EFCM411E222CL) = € 37
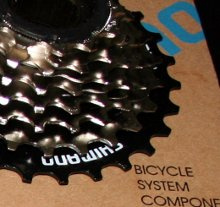
Shimano 7sp 13-28 freewheel (EMFHG377328L) = € 15
Shimano Altus M310 7/8 Speed Rear Derailleur (ERDM310DL) = € 17
Shimano Chain CN-HG50 6-7-8 gears (ECNHG50C116) = € 15
The parts cost me around € 100, including shipping. I forgot to include the bottom bracket in this image...
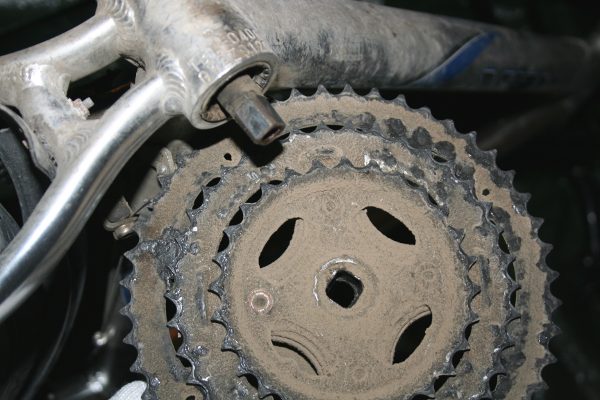
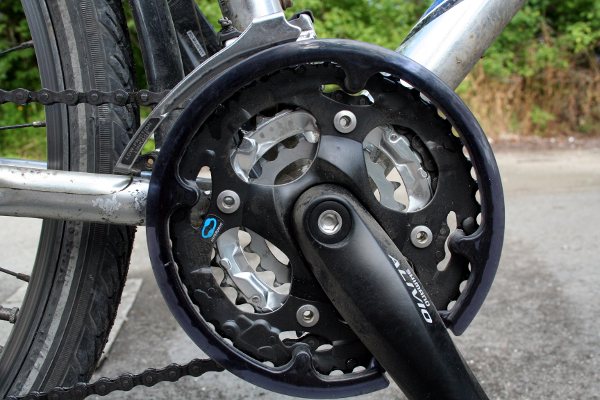
Removing the old front chainwheel
First, remove the crank bolts with an Allen key (both turn counter-clockwise) until they come out. Then remove the crank with a crank puller tool (see next image, bottom left). Notice the jagged teeth, quite worn down.
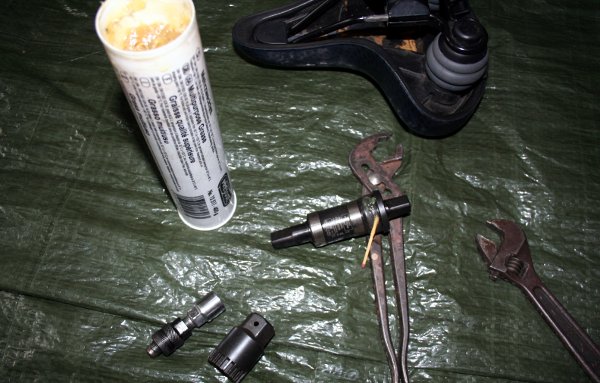
Installing sealed cartridge bottom bracket
Remove the bottom bracket with a bottom-bracket tool (see image, bottom center). The bracket housing should be greased before installation of the new bottom bracket, to make future removal easier. The crank-puller is seen at the bottom left. Don't use the plastic adapter that comes with the new bottom bracket, in stead use one of metal, to secure it with.
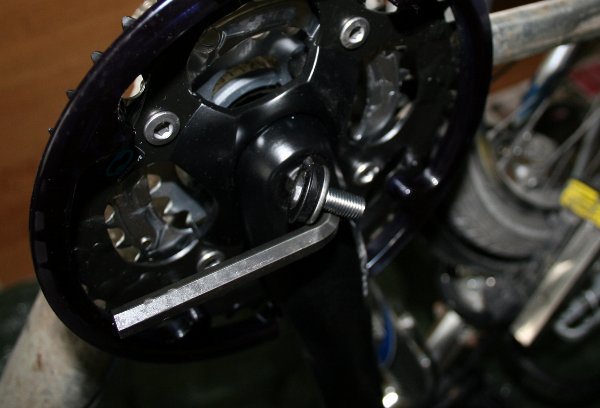
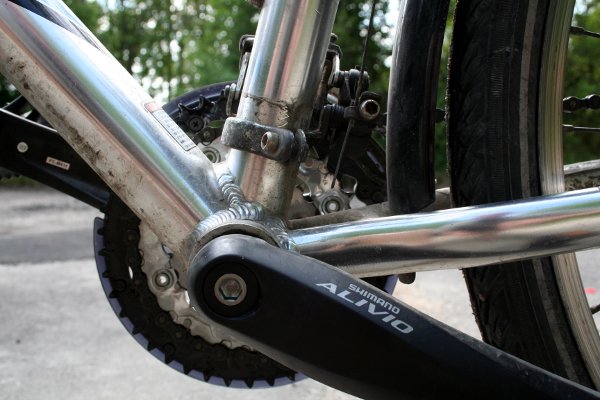
New front chainwheel
Lube the new front chainwheel and tighten the crank bolts with an Allen key, both turn clockwise.
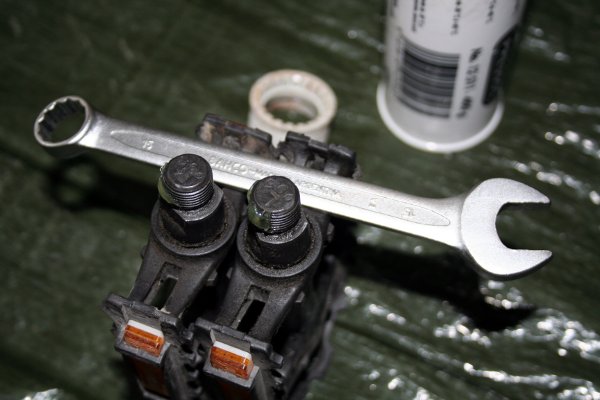
Install the Bike Pedals
Before installing pedals, grease the threads, this makes it much easier to remove them in the future. Use a narrow 15-millimeter wrench and remember that the left pedal is a left-hand thread, the reverse of normal, so turn it clockwise to loosen. You can see the plastic adapter that comes with the new bottom bracket in the background.
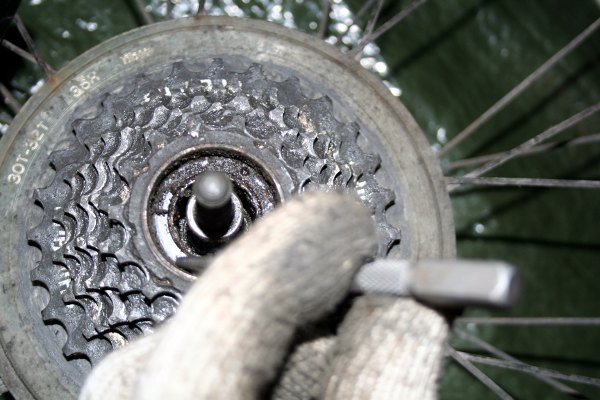
Destructive removal of multiple freewheel
The freewheel was REALLY stuck, even though it was lubed when I installed it. I tried to remove it the "correct" way, with a chain whip and a freewheel puller, but it was totally stuck. Destructive removal was the only solution -- the freewheel was going to be thrown out anyway. I used a hammer and a punch in one of the two holes to turn the ring in a clockwise direction and release the outer body of the freewheel .
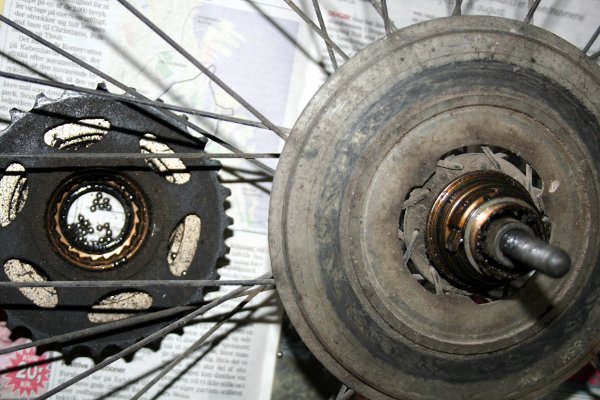
Outer body of the freewheel is off
The outer body of the freewheel has come off, and the inner body is now exposed.
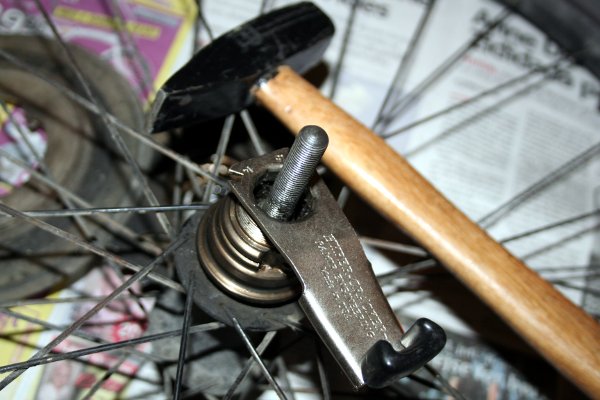
Hyper Cracker and a hammer
There are two flat areas on the freewheel inner body, which can be used for removal, by securing it in a vice and twisting the wheel. But I don't have a vice. Luckily, I found a strange tool in my tool box -- a Hyper Cracker. I tried to see if it fit, which it did...
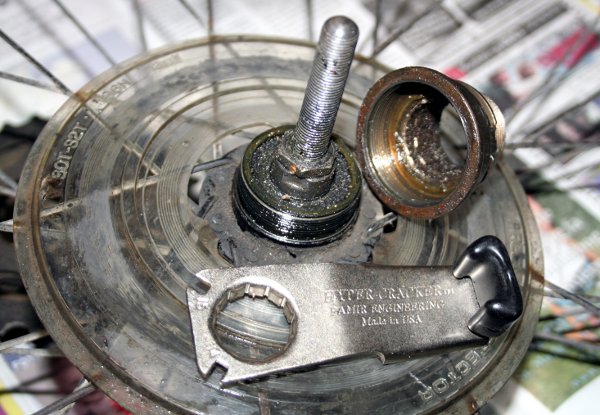
Last part of the freewheel is removed
I inserted it and gave it a whack (counter-clockwise, the inner body is threaded clockwise onto the hub shell) and the freewheel inner body came off -- Hyper Cracker rules! After searching a bit, I re-learned how it is normally used, to release the outer lockring on inner threaded HyperGlide cassette hubs: Slide it into the outer lockring and re-install the rear wheel. Pressure on the cranks revolves the wheel, until the lever contacts the frame, and the added pressure backs off the outer lockring. I have used it a lot many years ago, when I had a bike that was popping a lot of spokes, and the freewheel had to be removed to gain access. But this technique didn't work here, since the insertable part of the freewheel was too deep inside it.
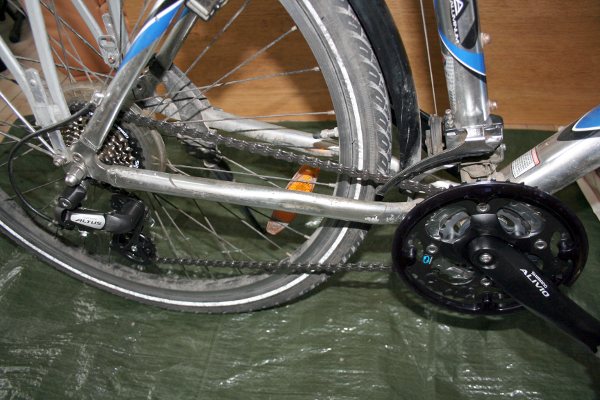
Sealed cartridge bottom bracket, chainwheel, multiple freewheel and rear derailleur installed
The rest of the parts are installed, remember to lube the freewheel before installation. When installing the rear derailleur, the lever should be set to the highest position (smallest sprocket) and the cable re-secured with a little slack.
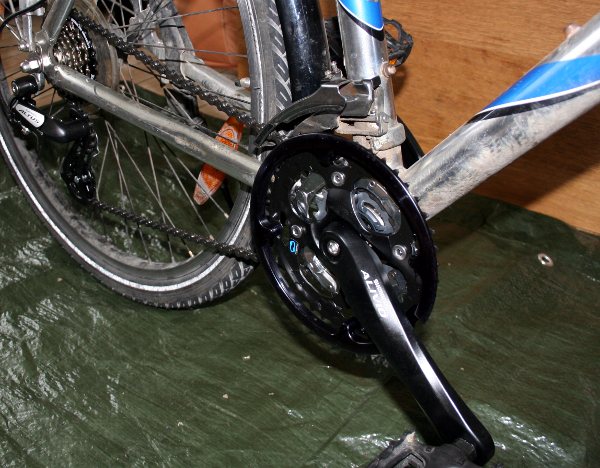
Front derailleur is mounted too high
From this angle you can see that the front derailleur is now mounted too high, because of the old 28-38-48 crankset. The new crankset is 22-32-42 and therefore smaller.
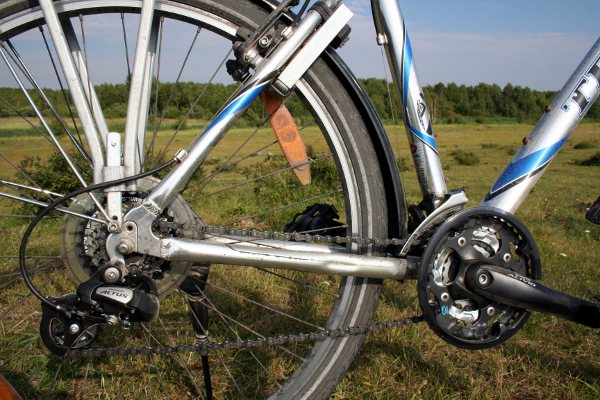
Chain length -- smallest chain ring in front and smallest cog in back
The chain shouldn't be sagging, nor the lower section of chain rub at the upper pulley. Remove some links if it is too loose.
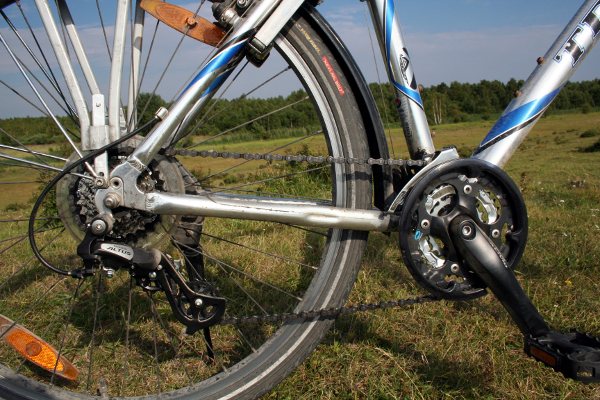
Chain length -- largest chain ring in front and largest cog in back
The chain should make an "S" bend as it passes through the pulley wheels. If not, it is too short.
Front derailleur lowered (front)
To accommodate for the smaller 22-32-42 crankset, I lowered the front derailleur about one centimeter.
Front derailleur lowered (back)
I loosened the Allen bolt for the cable before the Allen bolt for the derailleur itself.
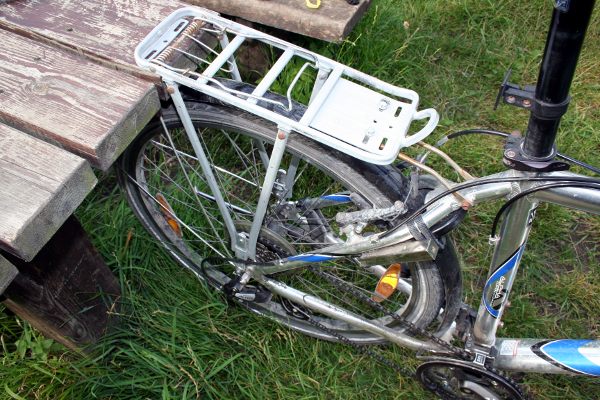
Garden bench used as a bike lift
I put the rear bicycle rack on a garden bench table, which lifted it enough to get the wheel free off the ground. I could then fine tune the front and rear gears with both hands free to operate the pedal and lever. Align the pulley position with the smallest and largest sprockets (top screw = smallest sprocket, bottom screw = largest sprocket). Then fine tune with the outer casing adjustment barrel.
I am very satisfied with the result, it almost feels like a new bike -- and for only €100 ...not to mention the fun of putting it all together !
Cup fit tool used
Hi, thank you for this great tutorial. Really helps me. I just got a second hand Trek 4100 and it needs a new bottom bracket. I did a lot of research prior but I still want to ask a question to be sure. On the photo, next to the crank puller lies a cup fit bottom bracket removal tool, which one is it? I see all sorts of variations on the internet and since ill only be using it once or twice i just want the right one. Is there some kind of brand/type encrypted? Or are they all the same? Many thanks!
_
Hi, congratulations with your new, old bike :-)
It says "BIKE HAND YC-26BB" on the bottom-bracket tool.
Good luck!
Wrong way to remove, but thanks!
The reason you couldn't removed the freewheel is that - at least as I read this - you didn't use a tool like the Park FR-1. What you did was disassemble the one way clutch, the free wheel. The FR-1 removes the entire assembly at the bike's hub. It takes a LOT of torque, my 1/2" drive breaker bar wasn't enough. I had to use a 3/4" drive with a couple of feet of pipe! A good two to two and a half feet of leverage!
I am redoing the rear part of the drive train because I wore out the chain and the two smallest sprockets.
While the 34 tooth Megarange set was very useful when I lived in Colorado, it's worthless here in Florida. I have, in effect, and 18 speed. I have spent a LOT of hours looking for something other than the 13-28 like you got. My local bike shop will have an 8 speed Sun Race in for me tomorrow. If it is the same length, I'm good. It's 13-32 teeth, so a tad greater at both ends and spread out better in the middle.
http://www.loosescrews.com/index.cgi?d=single&c=Freewheel&sc=Complete%20Freewheels&tc=8%20Speed&item_id=LS-6212WF&id=528319820403
I will get it shifting in one of several ways. First, the obvious, I am looking at a couple of the same EZ-Fire shifters but in 8 speed version. Or, I'll use it as a 7 speed, forget the 13 tooth sprocket. Or, I'll bet if I set the outer limit screw, I'll be able to get the derailleur out all the way.
I'll update soon.
I did try the right way first
I tried to remove it with a chain whip and a freewheel puller first, like in this picture: http://www.bicyclebuys.com/productimages/1736217.jpg
Like you, I also tried to use a pipe for leverage. I just didn't have enough pipe to extend the wrench with to get enough leverage to remove it. One meter of pipe sounds like what I would have needed :-)
I have since successfully used a vice to secure the Park FR-1 like tool, and have two persons pull the wheel in the right direction, with full force to get the freewheel off. I am kinda looking forward to only having cassette hubs on my bicycles: http://sheldonbrown.com/free-k7.html
Good luck with fixing your bike up.
OK
Thanks for the clarification.
I did try an 8 speed freewheel and it won't quite fit, the forward most part of the smallest sprocket touches the frame stay. I think some simple shifting of the wheel by a millimeter or two to the left might do the trick. A longer axle tube would be good, too, as the ends that locate into the frame become even less than they are.
I think this will be a good winter project, such as winter is in Florida.